This is something I wanted to implement for a long time and now I’m happy to announce that Diving Log has finally integrated deco calculations. I’ve implemented the Bühlmann ZH-L16 algorithm and now Diving Log can display data like NDL, ceiling, stop time and tissue saturation even if this data cannot be imported from the dive computer. Most sport dive computers do not record the relevant deco information and because of that, this data is missing in Diving Log and you have to go into the manufacturer software if you want to see it.
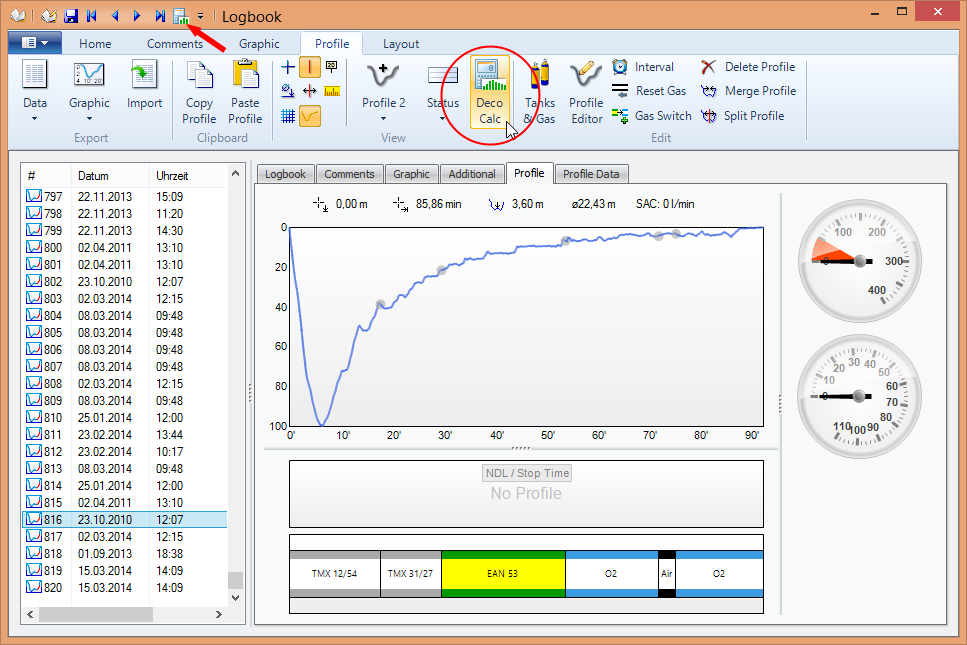
If you want to try it, please download the latest beta version first. In the logbook window, open the “Profile” tab and click the “Deco Calc” button to view the current dive in the new deco calculator window:

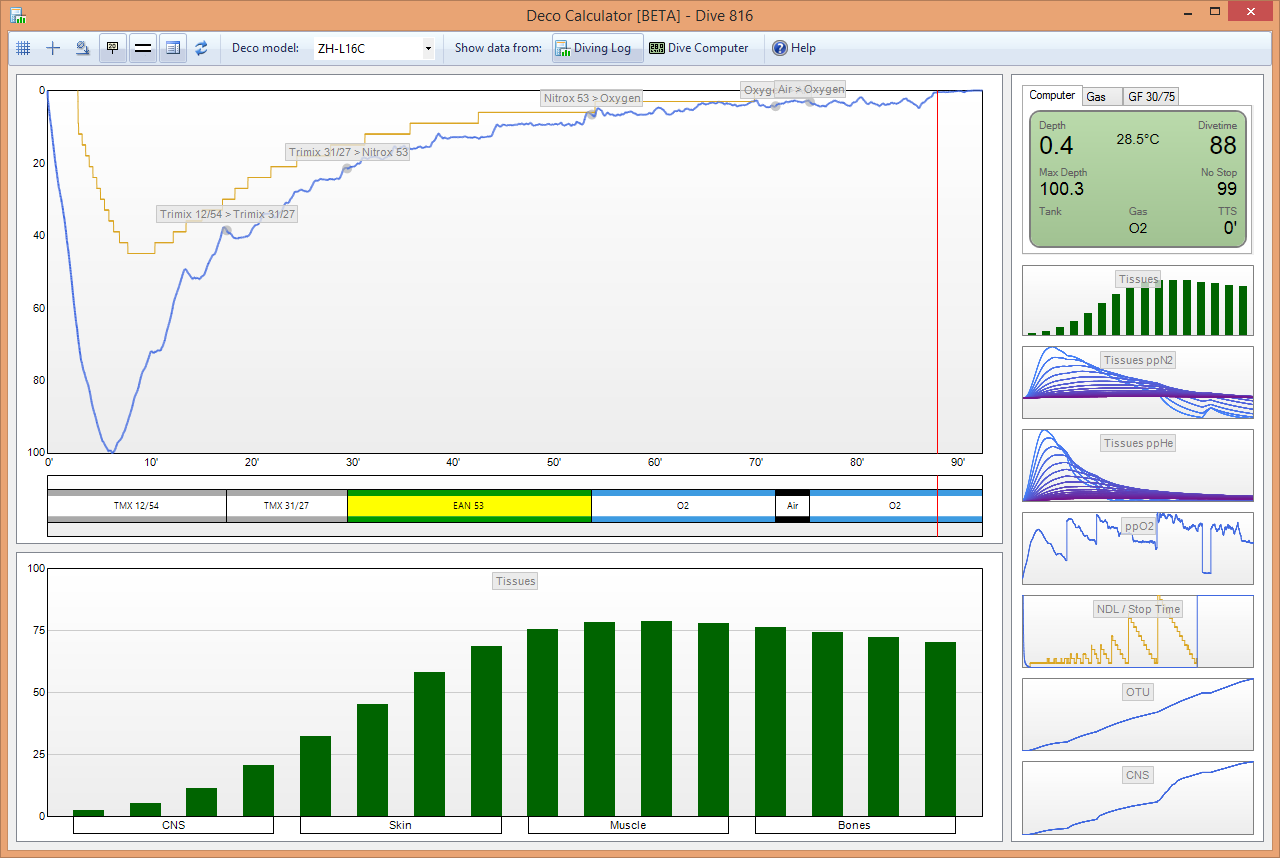
Open the deco calculator

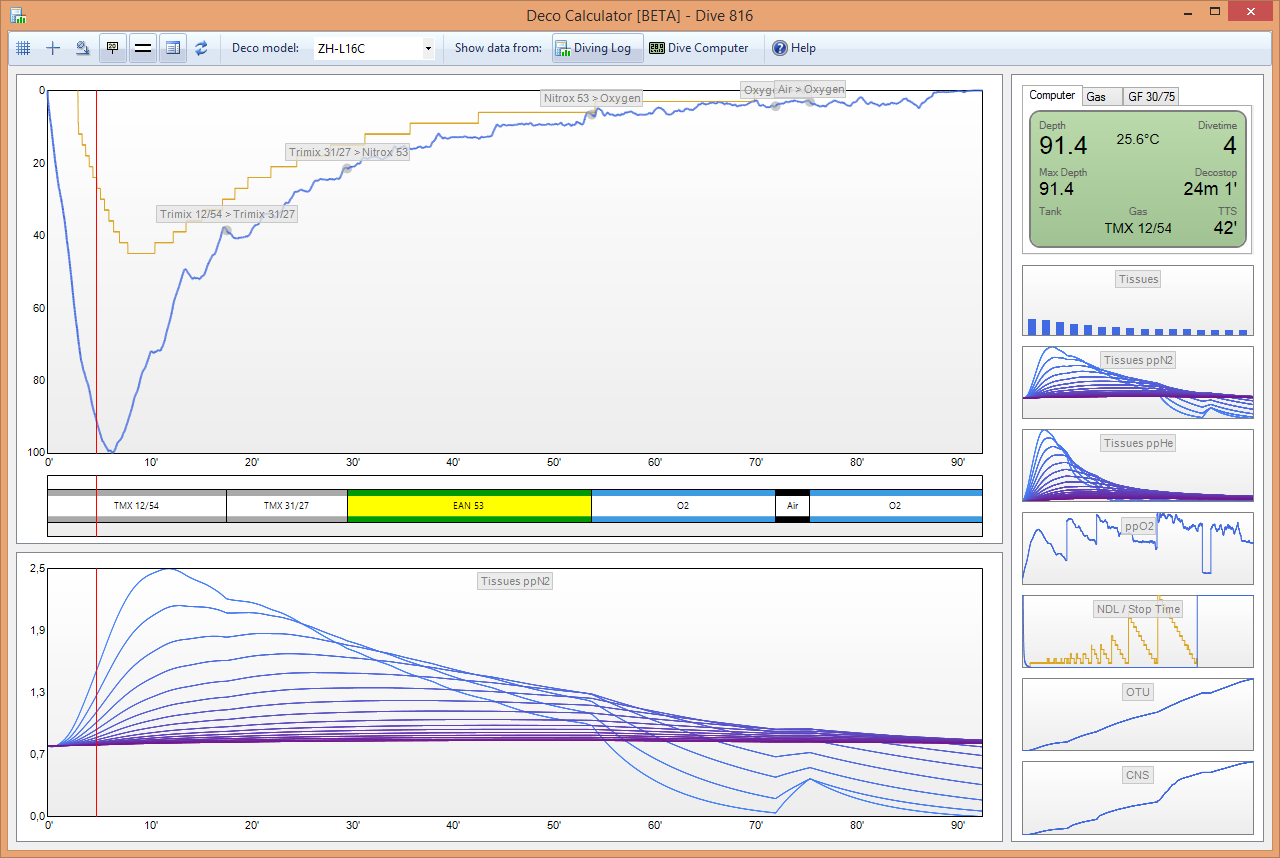
Deco Calculator with ppN2 tissue data
On the top, you have the depth profile with deco ceiling and gas switches. In the toolbar you have several display options and you can switch between the three ZH-L16 variants (A, B or C). You can also switch between data calculated by Diving Log and the data recorded and downloaded from your dive computer (if available). That way you can compare the results easily.

ppHe tissue saturation
On the right side, you have a virtual dive computer display. Click anywhere into the profile on the left to update the computer display. On the “Gas” tab, you can quickly change the O2 and He values of the current gas for simulation. This will not change the gas stored in your logbook, so you can safely play around with the simulator to see how different gas mixtures influence the tissue saturation and deco profile.

ppO2 profile with gas configuration
On the “GF” tab, you can activate gradient factors (GF High and GF Low) to adjust the conservatism. When deactivated (GF 100/100), you have a pure Bühlmann calculation. When activated (default GF 30/75), you get a more conservative deco profile with a lower first stop and longer last stop. The gradient factor is not downloaded from the dive computer, so you may have to adjust it manually to your preference.

NDL / Stop Time with GF configuration
Additionally to tissue saturation, ceiling and stop time, Diving Log calculates the oxygen toxicity profiles CNS and OTU.

OTU and CNS profiles
When you move the red cursor line around, Diving Log will not only update the dive computer display, it also updates the current tissue saturation [%]. Blue bars mean on-gassing, green bars mean off-gassing. If you see a red bar, this tissue is over-saturated (> 100%).

Tissue saturation (M-Values)
The deco calculator supports OC (open circuit) and CCR (closed circuit rebreather) dives with air, nitrox and trimix. Here you can see a CCR dive and bailout with air:

CCR dive with bailout
Current limitations and facts you need to know:
- No repetitive dives! Every dive is calculated isolated and previous dives and tissue saturation are not taken into account!
- No altitude diving! Every dive is calculated at sea level
- The calculated data will differ from the data displayed on your dive computer during the dive! This is because of different algorithms, parameters, other influences and limitations
- The current deco calculator is BETA. If you find any problems or errors, please let me know!
- The changes you make to the gas mixtures are just for simulation. No changes will be made to your stored logbook data
- Supported dive types: OC (open circuit) and CCR (closed circuit rebreather) with air, nitrox or trimix
- Supported deco algorithms: Bühlmann ZH-L16A, ZH-L16B and ZH-L16C (default)
- Gradient factors can be used for conservatism adjustments
- Bühlmann 1b values are being used
This data will be calculated:
- Tissue saturation (ppN2, ppHe, M-Values)
- NDL (no deco limit)
- Ceiling (deepest deco stop)
- Stop time of deepest deco stop
- CNS (central nervous system oxygen toxicity)
- OTU (oxygen toxicity unit)
Disclaimer (full version included in application):
- Do not use this calculator to plan real upcoming dives
- Always compare the results with other applications and dive computers
- You use this application at your own risk
- Use a dive computer when you go diving


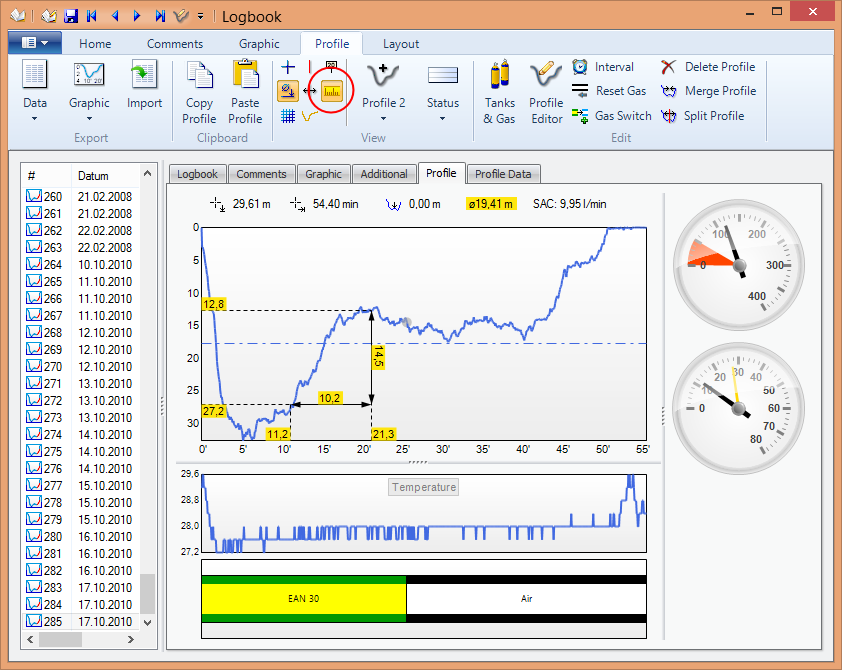
 The new profile drawing function is also improved and fixes some issues from version 5, e.g. the redrawing glitch which you can see when you drag the profile window off-screen and back into view:


Diving Log 6.0 – Comments & Photos
Saturday, April 11th, 2015The comments field supports now two modes: plain text and RTF (Rich-Text-Format). By default, the formatting controls are disabled for new dives and comments are saved as plain text. If you want to enable formatting, click on the “Rich Text” button in the comments toolbar:
Enable Rich Text to use formatting
This can be done for each dive independently. When syncing with smartphones and tablets, the formatting is lost anyways and most users probably don’t use the formatting options for most dives, so it makes sense to activate RTF only for those dives, which need formatting. There is also a new spell checker included, which can be activated for the comments field.
Photo Tab
The Exif display for photos is now improved. The most important Exif data is displayed in a single text field row. When clicking the button at the end of the field, you get a very detailed popup with lots of additional information:
Detailed Exif data for each photo
Tags:Comments, Logbook, Photos
Posted in Diving Log 6.0 | Comments Closed